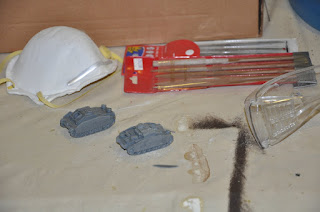
Any time you deal with resin it will start something like this:
That green stuff is Simple Green. Other times it gets soaked in warm soapy water. The soap part being run of the mill liquid dish detergent, I think I use Dawn. Like all resin, Flames of War stuff is sometimes shiny to the point of being unprimable. When car primer wont stick, you know something is up. This batch got soaked in both.
Resin is brittle!!! Mild agitation (I swirled it gently in the spaghetti jar) can lead to breakage as shown.
Luckily, resin is highly porous. Because resin is a two part mix, even if it is smooth to our eyes, resin is actually very rough at the micro scale as the are tones of air bubbles and fine cracks as teh two luquids combine. This means it takes very well to super glue as shown below.
You will notice that StuG in the start set is two pieces: a resin body and a pewter gun. Because of this, the underside is not only filled in with resin, but is channeled and cut in such a way as the model floats above its tracks. Those Germans were advanced, but not so fast Adolf!
That is a lot of resin to file out. Resin is toxic and spews dust every where. It is cold and rainy outside. Therefore I will cut my resin inside. And therefore create a fine layer of toxic dust all over my basement? No way. Enter the Dremel and vice. Below you can see how I mounted a vice with balsa wood jaw guards and scotch tape. This allows a rather firm grip on the solid body of the model. You'll want a solid grip for this next part. Notice the white plastic bag to catch the dust. That is key, otherwise you just making a bigger mess than filing it down by hand.
If you zoom in, you can see where I carefully cut a nice channel out next to the tracks. The goal was the cut a series of these channels and then chisel out the remaining fins like so....
Instead, I was having so much fun, I decided to just grind that whole puppy down. (the picture is an intermediate step)
The key is , because of carefully Dremel usage, the vast majority of the dust ended up in that garbage bag, and not on the floor or floating around int eh air as it would have if I had taken a file to it from the beginning.
Safety First! Despite having the dust going where I wanted safety is essential. That dust is nasty, and Dremel bits are know to come flying off, as are chunks of resin. Goggles and a dust mask are important.
A little green stuff to repair my over zealous nature with power tools, and voila!


2 comments:
After reports of the page discarding comments, I am just testing this thing out.
-Bryce
Update your damned blog... :P
-Reece
Post a Comment